The Shellcore Command Episode 2 Logo, as seen on the Beta V0.91 Main Menu
Shellcore Command: Episode 2, currently was not available officially to the general public and not released to any official flash game portals (noted by the fact that it was not legitimately sponsored by Flash Game Nexus, as their logo did not ever appear in the pre-load screen, the game run immediately after it loaded and without the presence of the "Play" button, unlike the other officially published games in the series), was the next installment in the Shellcore series. It takes the improvements from Skirmish, adds some more of its own as well as a few new concepts, and gives the thing a pretty good plot. You finally make it to the capital platforms, but, suprise, turns out you're getting infected yourself!
Gameplay
EP 2 is actually EP1 plus the new areas and missions of EP 2. All of it follows the new rules. The game plays a bit like Skirmish, but better. Some new units were added, first off. The number of tanks was doubled from 3 to 6, with the addition of the fast Speeder Tank, the slightly slower and heavier Bullet Tank, and the anti- air station Rocket Tank. A new and very useful drone was added, the Worker Drone, which automatically picks up Shellcore parts and 'shards' (more on those later). There are also new parts. The most notable is Stealth, which, well, cloaks you for a short time. There's also the Gun, an anti-tank weapon; the Statis Field, an interesting ability which freezes nearby enemies but which isn't used much, if the community forums are anything to go by; and the Area Restore, which heals you and your allies (both Shell and Core). There's also one new station: Heavy Defense. Which is basically a Missile-shooting ground station. Sadly, it's only really used twice, first when going from the start, Haven 4, to the Capital Platforms, and then on the way to a certain spoilered location. Both times, they are quite easy to avoid. Otherwise, it just sits around in the core of said locations, never being used (unless you try to invade a infected sector with those defenses and are too weak or lazy to take them out).
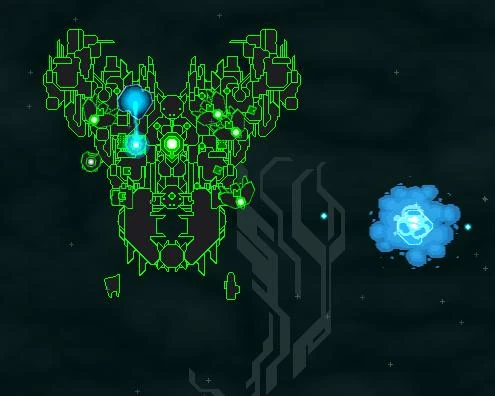
Shard mining in Episode 2
There are a lot of new enemy Shellcores,some of which have randomized abilities on them. The new Battlezones have a couple of new things. In one, the enemy has a whole bunch of carriers between you and their main ground base, with endless swarms of weak drones meant to take out your outposts and main base. In another, the enemy has TWO commanders. Luckily, you have an NPC commander on your side. Speaking of Battlezones, power units (from extractors/outposts and destroyed enemies) are now 20 power instead of 25.
EP 2 also introduces Shards and core upgrades. See, like Skirmish, you have a part limit. But you can increase it with core upgrades. which you can buy from core upgraders. That is, to a point. You can upgrade your Core to a higher level (size-M and then Size-L) to allow for more, and, presumably, to make it tougher and more powerful. However, that requires not only money, but Shards. Shards are these little blue fragments that you can obtain by destroying 'power clusters' (which look similar to the things that generate power), found south of the Capital, and taking the fragments back to a yard. These things currently have no other purpose, though.
Graphics
Same as Skirmish.
Audio
Still same as Skirmish.
MAJOR SPOILERS!!! Avoid unless you have finished Episode 2 already!
Shellcore Command: Episode 2: The Infection Plot
Episode 2 begins exactly where Episode 1 left off. While you are still captured by an Infected Commander, this time you can continue on to Haven 4. At Haven 4 you report your capture and the conversation you had, then receive a Stealth part for free so that you can reach the Capitol Platforms in relative safety. You are then sent to the Capitol to report of your capture.
After battling your way through many infected-filled sectors, you arrive at the Capitol. You should probably reconstruct at a yard then, because you're probably almost dead, but that is optional. You can wander through the Capitol a bit to familiarize yourself with the layout, then report to the largest shellcore in the Capitol South. He orders you to begin ground combat training. Once you are finished, you go to Battlezone Blah and destroy the ground base.
Next, you follow the traitor frigate and kill him/die within 3 minutes (or you can refuse the mission, but there's no reason to do so). After that you talk to the Uninfected leader, who informs you that you may be infected. You will then have to get a Size-M core upgrade, to resist the infection. You'll need shards and 2k credits; you will get a task to get 10 shards. After you get the upgrade, you will get another task to fend off the Infected invasion on the Capitol Platforms.
This next task will take some time. You must fly to each of the 8 sectors around the center and clear them of enemy forces; if any are left alive, all the infected in the sector will respawn. In counterclockwise order starting in the Capitol North, the enemies are:
- North: LSW Core
- Northwest: Defense Core, Attack Core, LSE Core (x3)
- West (Challenge Sector): Defense Core, LSE Core (x4)
- Southwest: Infected Frigate (the only place in which he appears, ever)
- South: Defense Core, LSE Core, Attack Core (x3)
- Southeast (Advanced Trade Sector): Defense Core, LSE Core, Attack Core (x3)
- East (Basic Trade Sector): Defense Core, Attack Core, LSE Core (x3)
- Northeast (Upgrade Sector): Defense Core, LSE Core, Attack Core (x3)
After this is done, you have finished all your Capitol missions! For now. You can fly around and farm for parts. Eventually you'll find Haven 5, a small, mostly empty sector with a Carrier and a Yard. The Carrier will give you missions to clear battlezones Upper, Cenral, and Lower. After completing this, you're ordered to scout Sector 450-310. When you do so, you're captured by the Infected leader again, who orders you to visit him at his Capitol, in the north. You should do so, as going back will acheive nothing.
When you enter the sector below the Infected Capitol, you will discover that the guards, 3 Episode 2 deadzone cores, won't attack you. This will also occur in pretty much every other place, except in deadzones which will end the cease-fire. In the infected Capitol, the infected will talk to you. You can wander about and talk to them if you like, but eventually you should enter the capitol center and talk to their leader.
The Infected leader will reveal much about the war, and the "Infection", though they could be just lies, or an incomplete truth. Regardless, there are 3 ways this can end. 1) you can insult him and make him attack you, 2) you can accept his mission to go to the Jump Sector, and go there, or 3) you can accept his mission but show loyalty to the Uninfected by returning to your leader, who will order you to go there regardless. When you go there, you jump to the Abandoned Sectors, and Episode 3 is supposed to start!
Side Plot
There are 2 missions not related to the main plot and a re not necessary to advance the main plot. They are both given out by Clearly Delusionals in the Capitol Platforms. The first, more well-known one is to travel from the Capitol North to Haven 3 in 1 minute. This one is somewhat difficult, but quite manageable in a size-L core. The second is to clear Sector 140-360 of Infected scout cores. This is quite easy, there are only 6 of them and they are pathetically weak, though fast and stealthy.
Bugs
- Ship Data- Press "shift" while reconstructing to obtain data on your ship! (may not actually be a bug, but a feature)
- Free Parts- In Haven 4, keep accepting the mission to get a stealth part. He keeps giving it to you, as long as you don't put any on.
- Infinite Allies- Get tons of allies to follow you from Haven 1!
- Part Stacking- Flip a part twice, then put another part directly on top of it.
- Part Swapping- Press "shift", then click and drag a weapon/spawn/ability to another weapon/spawn/ability to swap them! Also works in traders.
- Eternal Pin Down- Use Pin Down 3 times on an enemy and he will be stuck forever!
- Trapped Semi-Cores- Double click on a semi core to prevent him from moving.
- Tank Turret- Tractor a turret that an allied commander is tractoring. It will be able to fire, even when airborne!
- Disappearing Main- Use the shift key to move the Main into a locked slot. The main will disappear forever! Works with any other weapon too!
- Multiple Escorts- Die in the Spawning Grounds. Another escort will spawn!
- Part Stacking v2.0- Click and hold on a part. Hold shift. Move the part to anywhere you want (by anywhere, I mean anywhere. As in, you can put a part directly on your core, on another part, and even in the very corner far from any other part), and the part will stay there! Let go of the mouse before shift. Click on the part one more time to make it stay, then reconstruct.
- Hidden Sector- When you die or use Retreat in the Infected Capitol, you appear in the Capitol South. Move left or right BUT NOT UP OR DOWN, AT ALL, and you will enter a new sector 1 pixel wide! Use it to cross deadzones.
- Flying Tank v2.0- Infected tanks that automatically appear in sectors may move off the ground towards you.
- Immortal Northwest- In the Central Battlezone, the commander is immortal. Even after the base is destroyed, he respawns! He is called the Hulk by Flashbacker.
- Sector Bug- If you go past the southeast corner of Sector 450-360, you enter an area with a green background that raises your control by 2. However, it does not appear on the map.
- Overlapping Cores- Some cores that are too close to a sector border may not disappear when you leave. When you go back, another core spawns, right beneath the old one. Notable occurrences: Haven 1 Basic Core, Northwest Core, Scouting Beamer, Infected Ground Base in Training Sector, and Missile Turrets in both Capitols.
- Challenge Glitch- When you play a tutorial mission, you get teleported to the upper left corner of the map. This also happens when you complete the Challenges in the Capitol Platforms. If you don't exit the sector, you may notice that the "victory" screen never appears.
- Moving Stations- Use Pin Down on an enemy Outpost. It will be able to move when the Pin Down wears off! You can defeat it again to place the outpost somewhere else, on your side. You can also get outposts to follow you out of the sector. It doesn't work with carriers, but DOES work on other infected stations (which means you can have infected yards chasing you around the capital).
- Moving Mission Marker- The marker for missions (little white triangle that appears on the mini-map and main map for missions) sometimes points to the upper left of the map for no apparent reason, usually when you have no other missions.
- Sudden Cease-Fire- Occasionally, when you start the game you will find yourself unable to attack enemies, and they are unable to attack you. This can be fixed by restarting the game or using Retreat.
- Reverse Part-Farming- Occasionally, dying or using Retreat while you still have parts on will result in you dropping a part. You can't pick up this part, and it doesn't rotate like other parts.
- Black Screen- The game is just a black screen. Most likely, your computer lacks enough RAM to run it. Restarting the game, your computer, or your web browser can fix this.
- Epic Crash- The whole game crashes. Cause unknown, but thought to be caused by simultaneously activating stealth while crossing a border. You're teleported to Sector 0-0, where you're immobilized. When you restart, your map data is cleared...
- Credit Snatching- Even after you buy all the slots, clicking on the spot to buy them will take your credits!
- Disappearing Shards- If you re-accept the mission to get shards for the size-M core, your shard counter resets!
- Backstabbing- If you don't accept the Infected Leader's mission by clicking the "X", he attacks! And so do his minions, but they still talk to you. While trying to kill you. This can also happen if you enter a deadzone, or you reconstruct at the infected Yard.
- Invincible Traitor- Sometimes you are unable to attack the Traitor. It's not known why, thought to be caused by the timer running out. You can fight him again by restarting, but the timer starts immediately.